Assuming you have read the previous article entitled ‘The pros and cons of running a home web server‘, this article forms the next section of the tutorial, taking the Debian route.
What is Debian: Debian is one of the oldest Linux distributions that is still maintained to this day, the main focuses of the Debian project are security and stability; these two properties help to make a good web server.
For the use of this article I am performing two installs, one on an IBM Thinkpad T20; Pentium III 700Mhz, 512MB RAM, 20GB HDD. The other is being installed on a ‘virtual machine’ to allow me to create clear screen shots of the installer screens.
Assuming you have already chosen your desired computer for use as a web server you will now want to download the desired Debian installation disc, this article is based on the NetInstall image, depending on your computer you will either want to download the i386 ISO or the amd64 ISO, if you are unsure of which one you require the i386 ISO is a safe choice. Download Debian NetInstall ISO. Once downloaded burn the ISO image to a CD-R disc ready to boot your new web server from (You may need to change the boot settings in your computers BIOS to allow you to boot from the Debian NetInstall CD.)
Turn on your computer and boot the Debian NetInstall CD, you will be greeted with the following:

Select install from the menu using the arrow keys and pressing ‘Enter’.
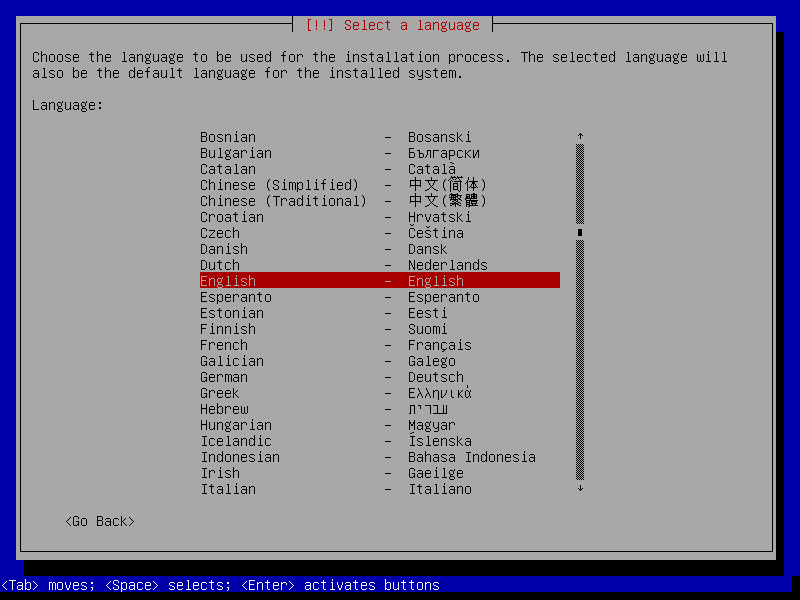
Select your desired language, in my case ‘English – English’.

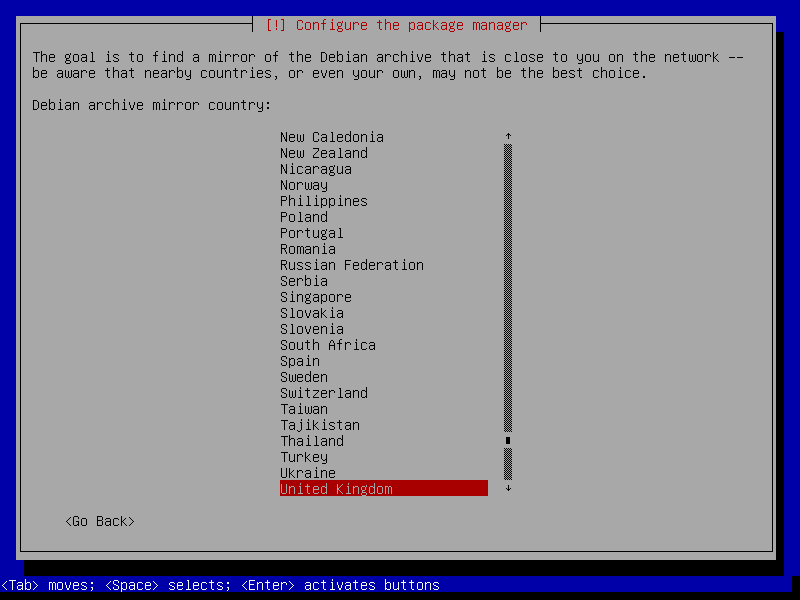
Select your physical location, in my case ‘United Kingdom’.
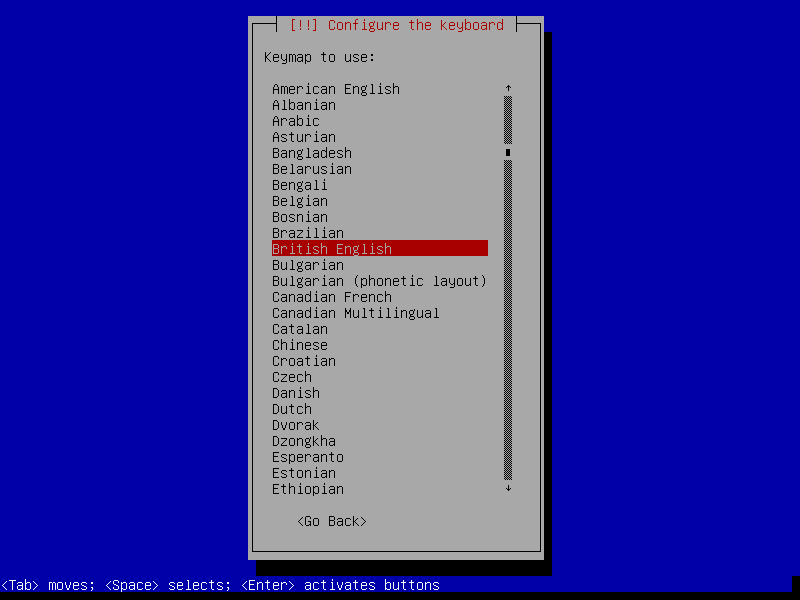
Select your keyboard layout, in my case ‘British English’.

Debian will now load some required resources and configure certain hardware ready for the installation.
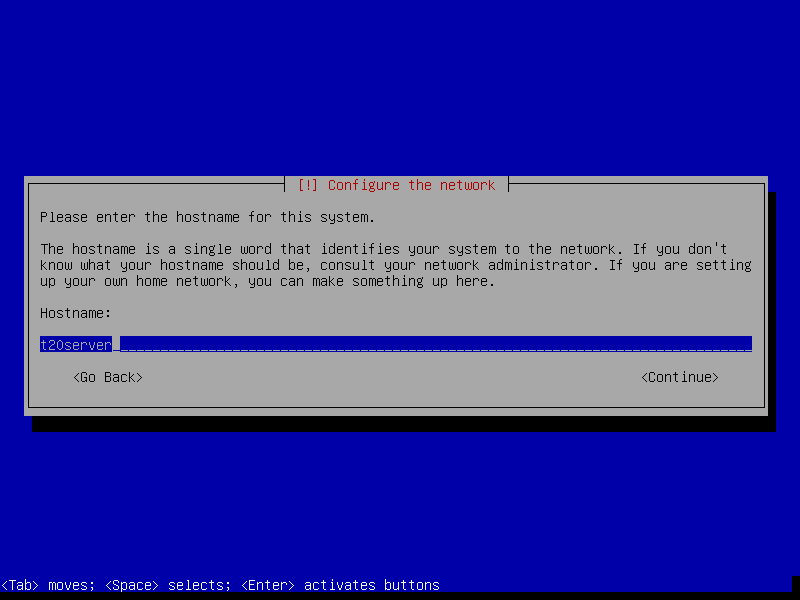
Enter a host name for your server, this can either be the first part of the domain name you wish to host i.e. for ‘domain.com’ you would enter ‘domain’, alternatively you can name your web server something like ‘myserver’.
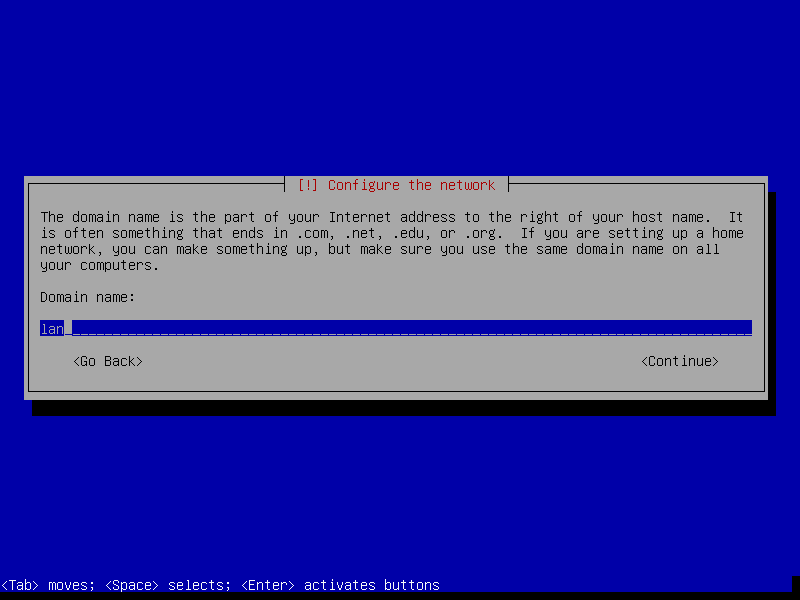
Enter a domain name for your server, this can either be the second part of the domain you wish to host i.e. for ‘domain.com’ you would enter ‘com’, alternatively you can give your web server the domain of ‘lan’.
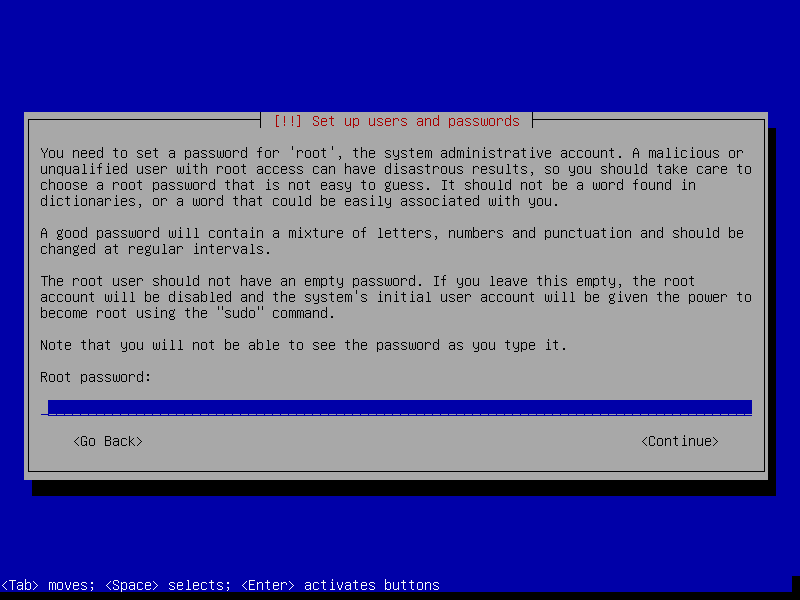
Enter password for your ‘root’ user, ensure this password is secure as the root account has access to alter any part of your web server. When you press enter you will be prompted to re-enter the password to ensure there were no typo mistakes.
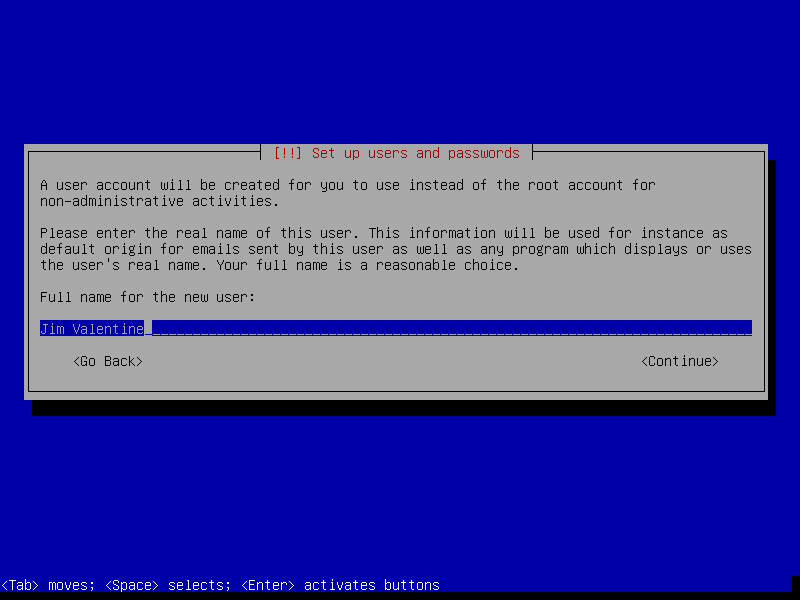
The installation will now create a non-root user account, to begin with enter your server admin’s name.

Enter the desired username for the new account, this will default to your users first name.
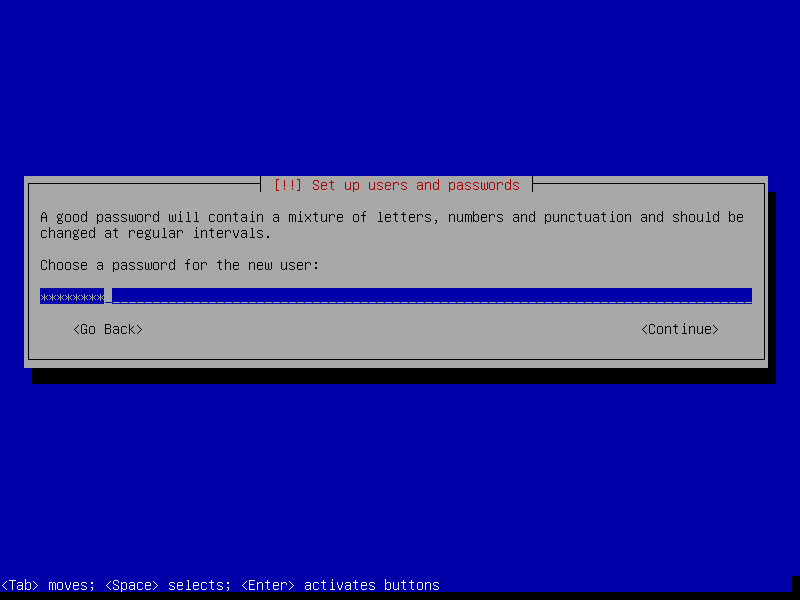
Enter a password for your new user account. When you press enter you will be prompted to re-enter the password to ensure there were no typo mistakes.
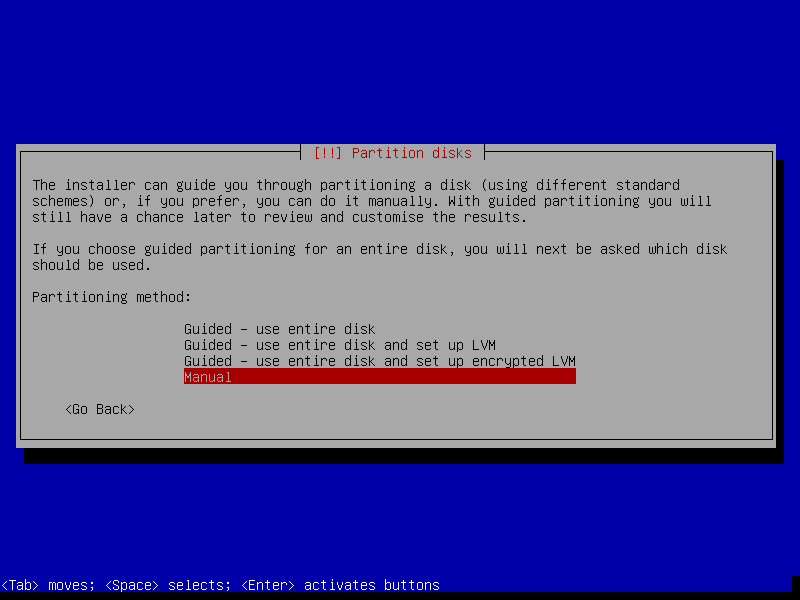
The Debian installer will now load the partitioner, although guided partitioning will be sufficient for a basic home web server it is always useful to know how to partition a hard drive for linux. Select ‘Manual’ to continue.
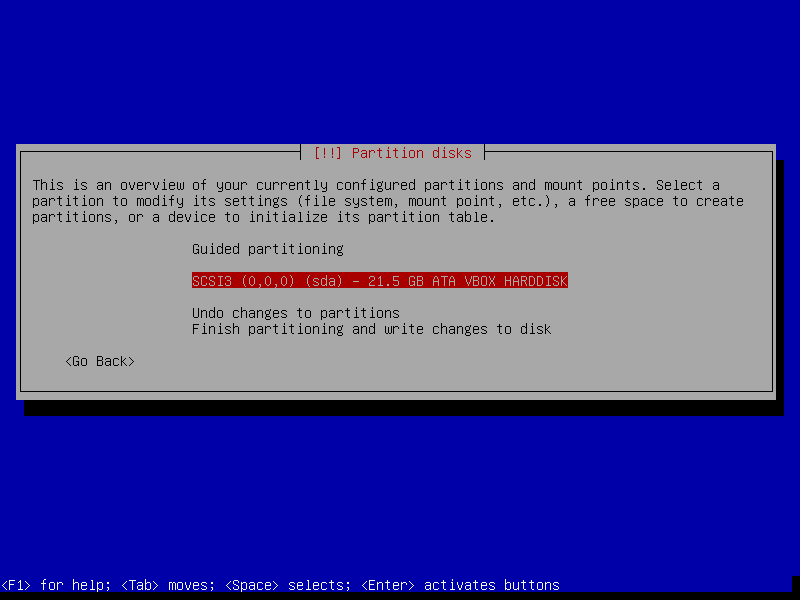
You will be shown a list of hard drives installed into your computer, in this instance only one drive is present. Highlight the desired hard drive and press Enter.
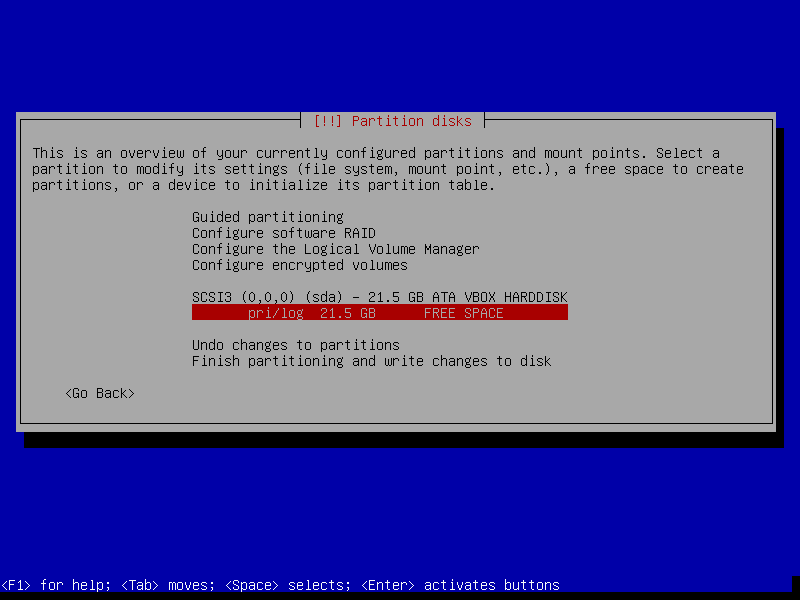
If there are unwanted partitions on the hard drive, highlight them and press enter, then select the option to remove the partition. To create a new partition highlight the free space underneath the desired hard drive and press Enter.

Select ‘Create a new partition’
[image 16]
Change the value to 1GB, this will eventually form a swap partition which is used when the computers R.A.M is running low.
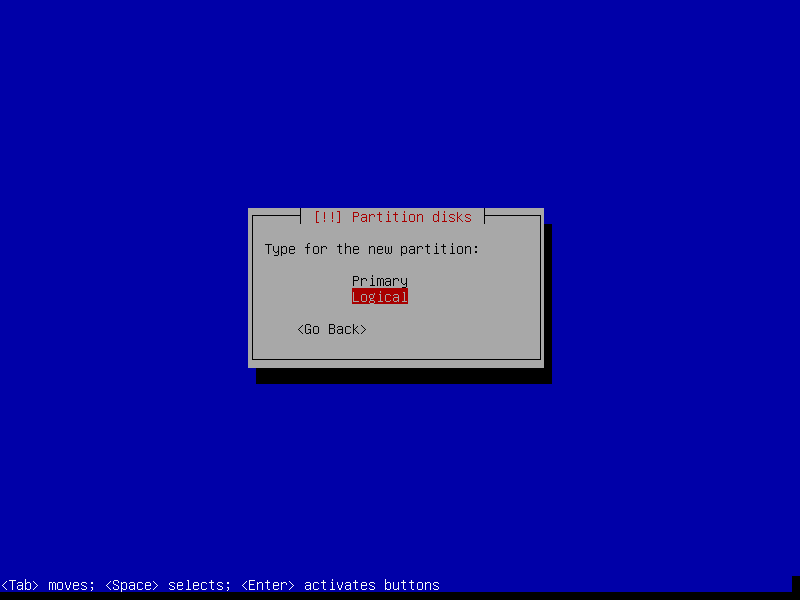
Select ‘Logical’ for the swap partition.
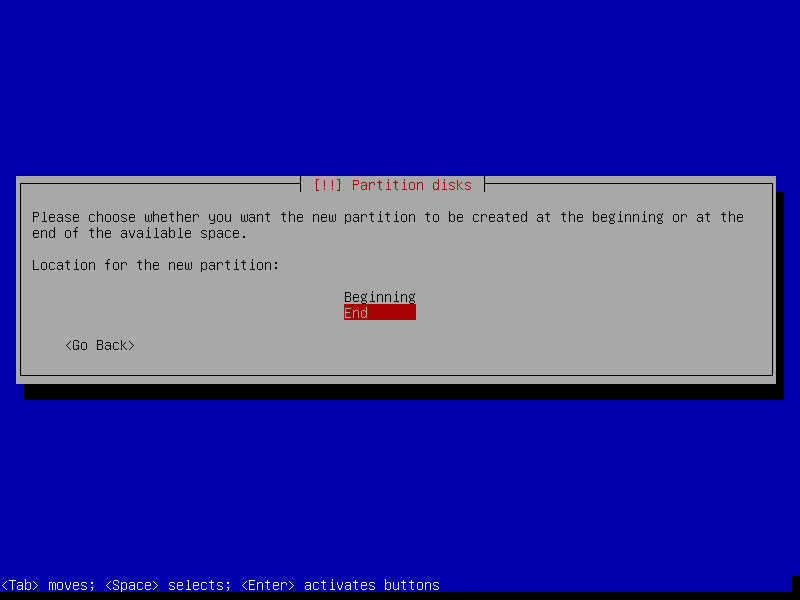
You may chose to have the swap partition at the beginning or end of the hard drive, my personal preference is at the end.
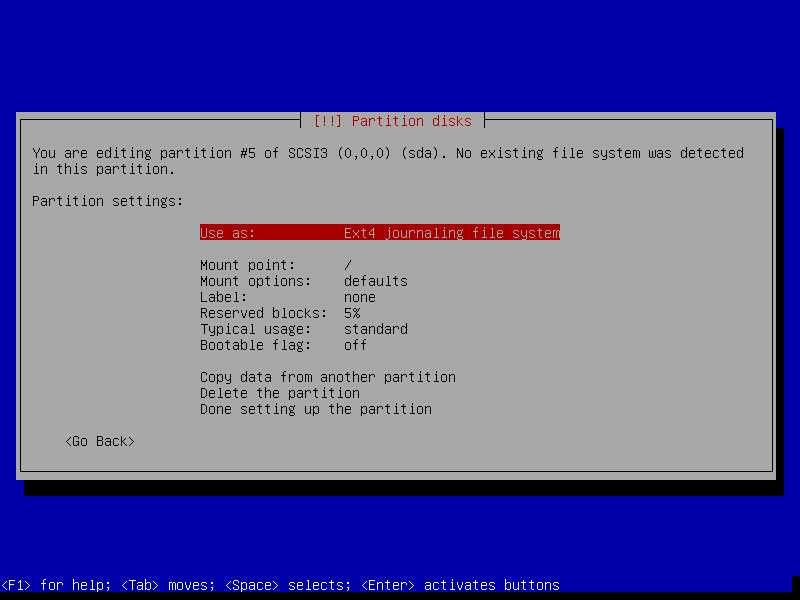
Select the ‘Use as’ option for the new partition and press Enter.
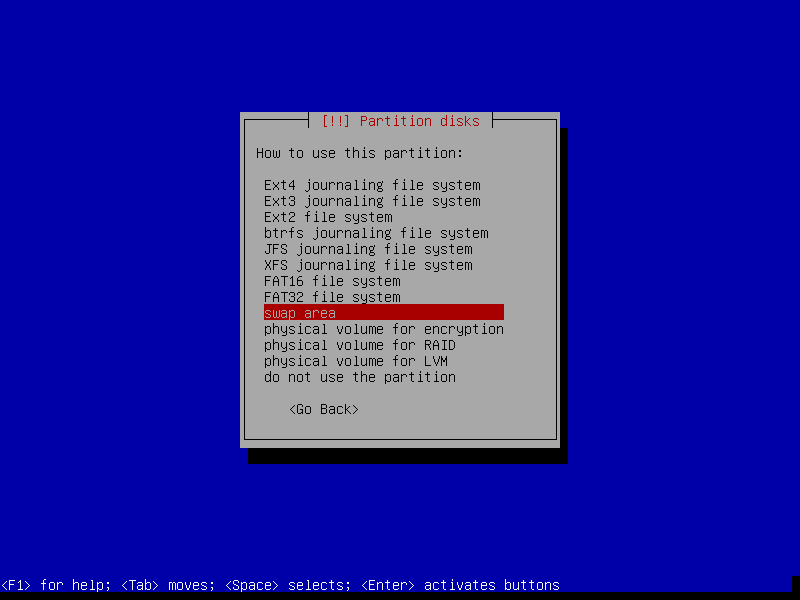
Select ‘Swap area’ from the list.

Select ‘Done setting up the partition’ to continue.
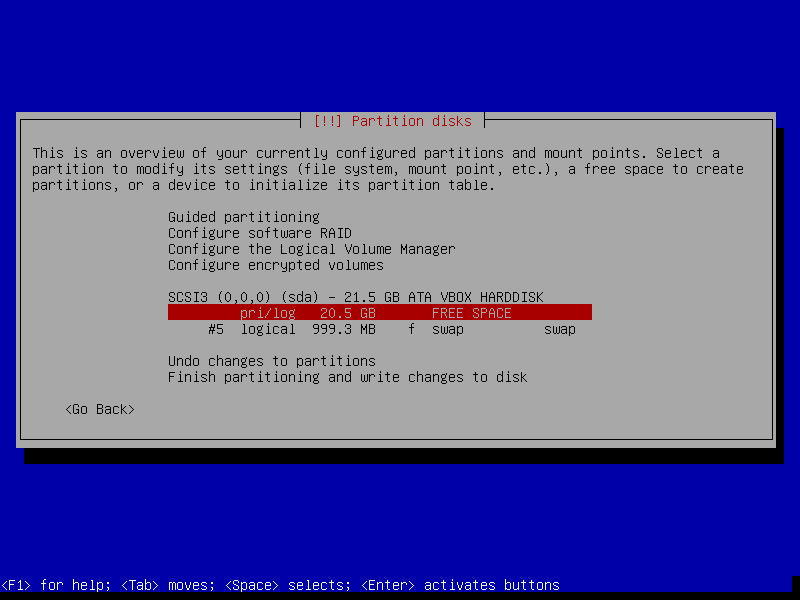
The partition table will now show the newly created swap partition below the desired hard drive. Again select the free space below your desired hard drive and press Enter.

Select ‘Create a new partition’
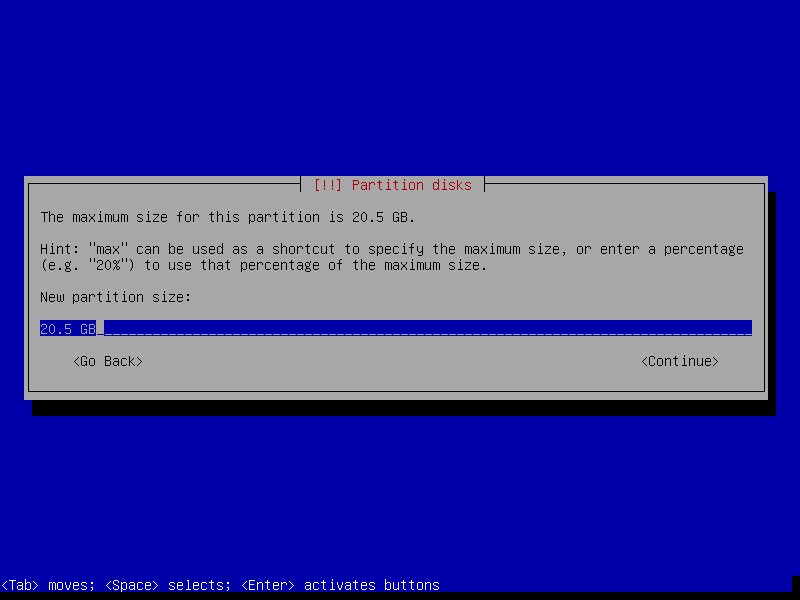
For simplicities sake I will create this article with a single partition. You may create the largest possible partition size depending on the size of your hard drive.
[image 25]
Select ‘Primary’
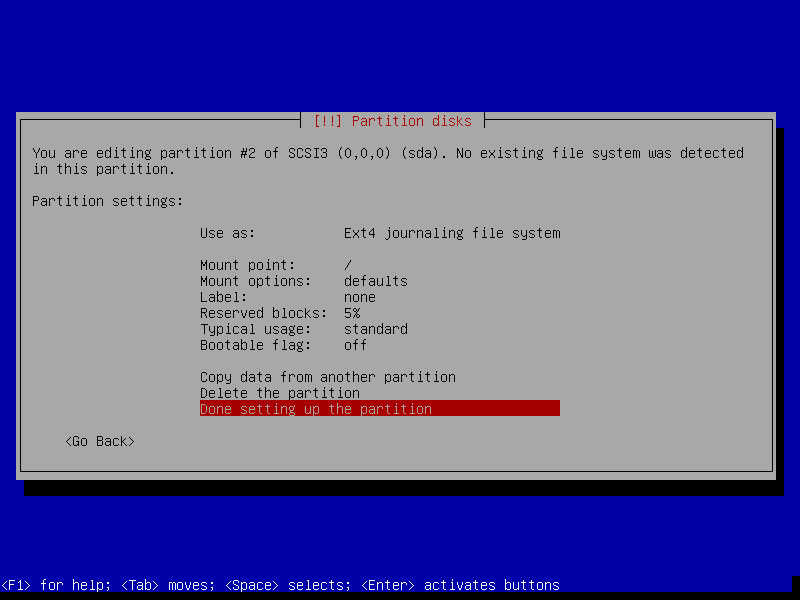
Select ‘Done setting up this partition’ to continue.
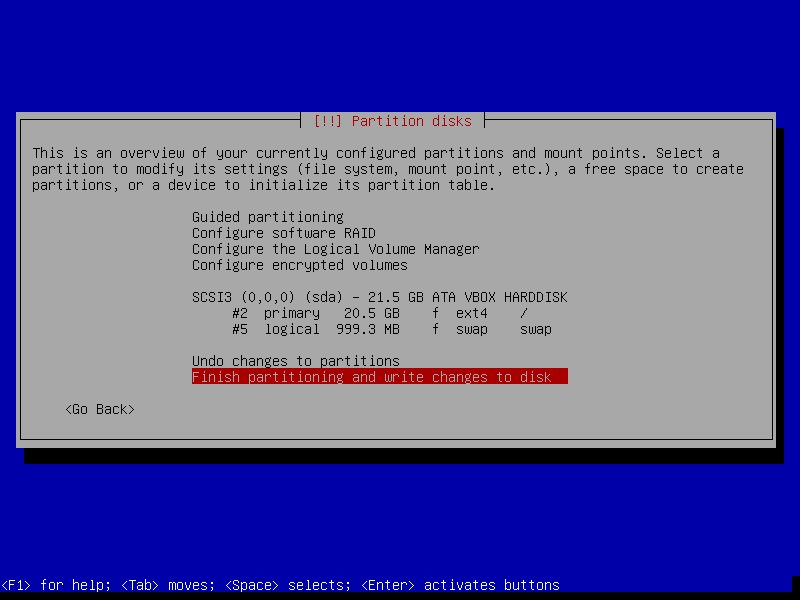
The two partitions required have now been created, select ‘Finish partitioning and write the changes to disk’.
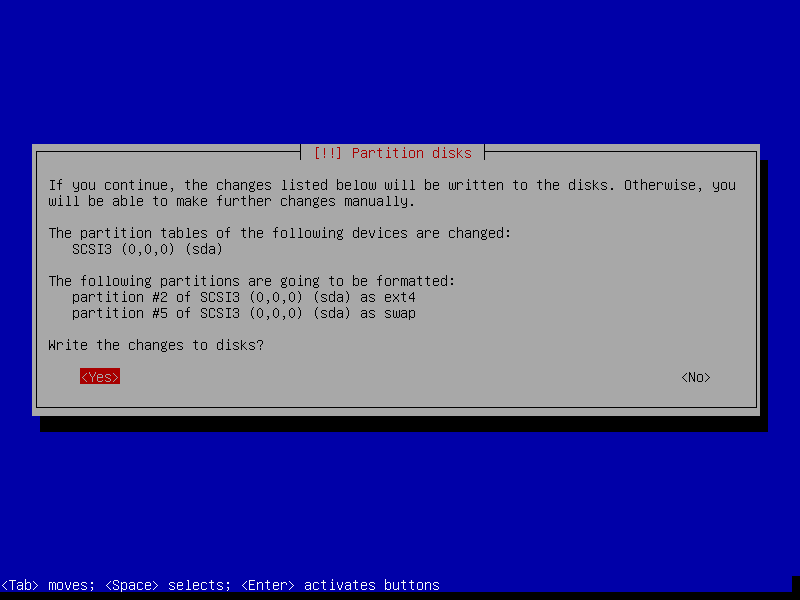
Confirm the changes to be written.

After the partitioning has been completed Debian will automatically install the base system.
Select the closest location to help select the fastest mirror server.
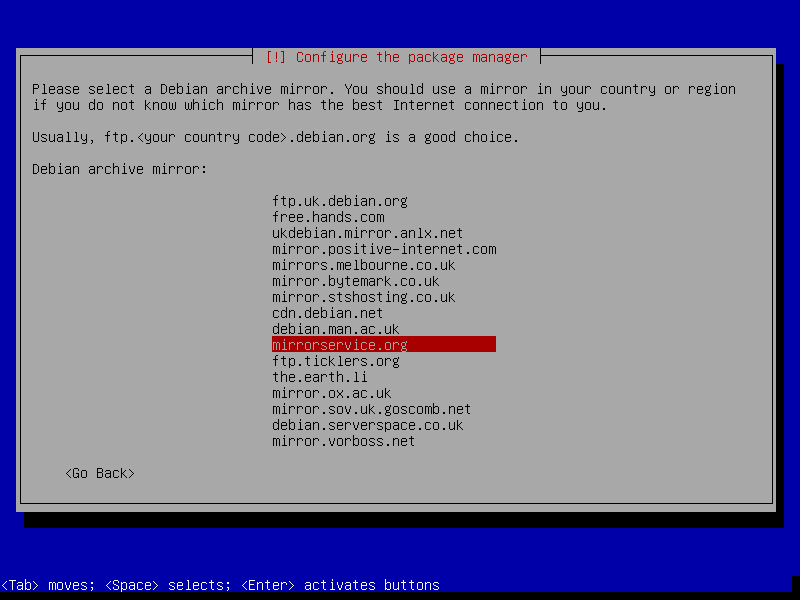
Select the desired mirror server to use, in my case I have selected Mirrorservice.org as their servers are hosted at the University of Kent, around 20 miles from my home.
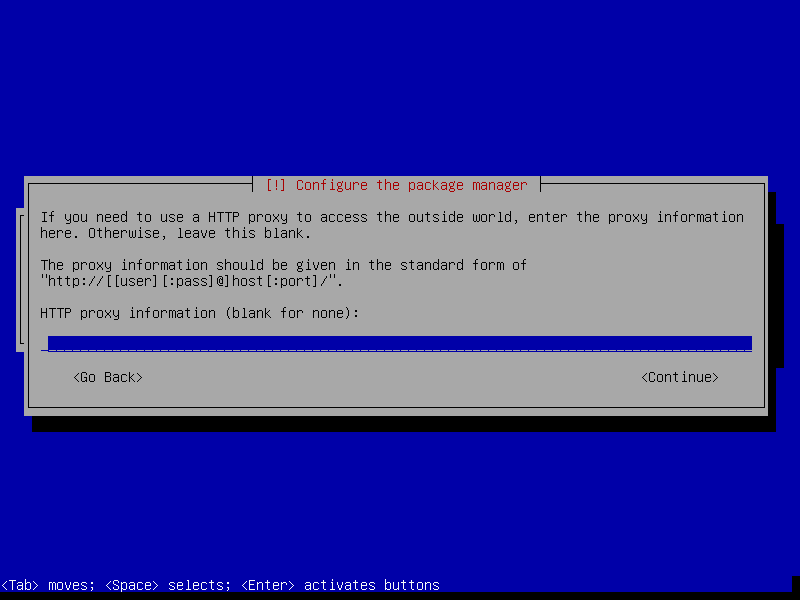
If your internet connection requires the use of a proxy server enter the information here, most home networks will not require the use of a proxy server.
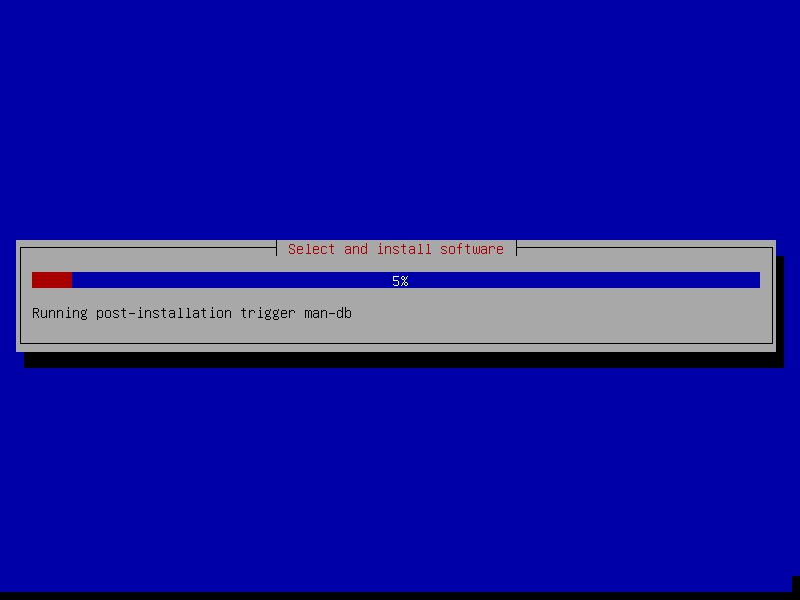
Debian will now set up the apt service which is used for installing software from a mirror server and download lists of available software.
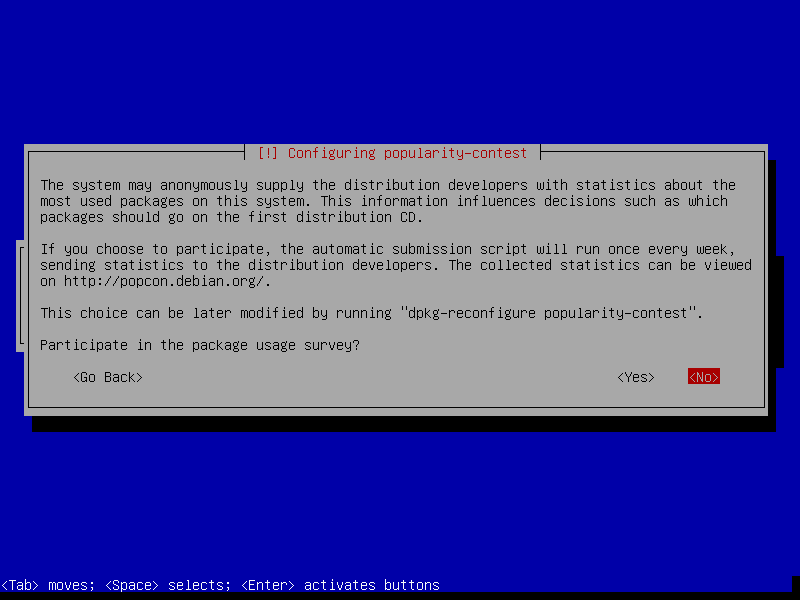
Decide if you wish to participate in the package usage survey.
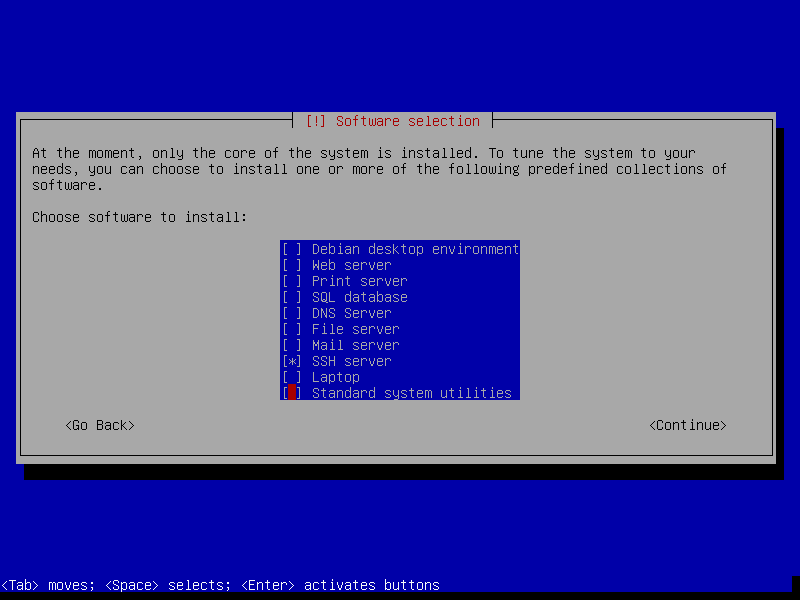
Deselect all software except for ‘SSH Server’, note you select and deselect software using the space bar, pressing enter will confirm the selected packages and install them.
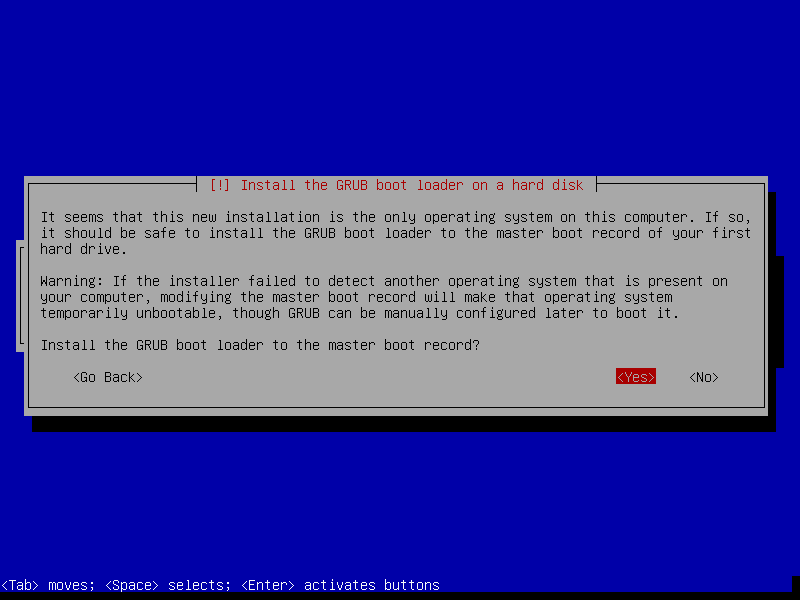
Select yes to install the GRUB boot loader to the master boot record.

The base installation is now complete. Select continue to reboot your computer into the new Debian install, ensure you remove the NetInstall CD before your computer boots up again.
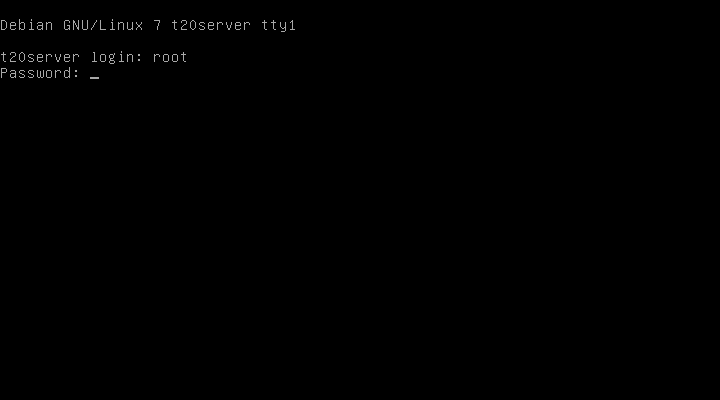
When your web server has rebooted, proceed to log-in using the root account.
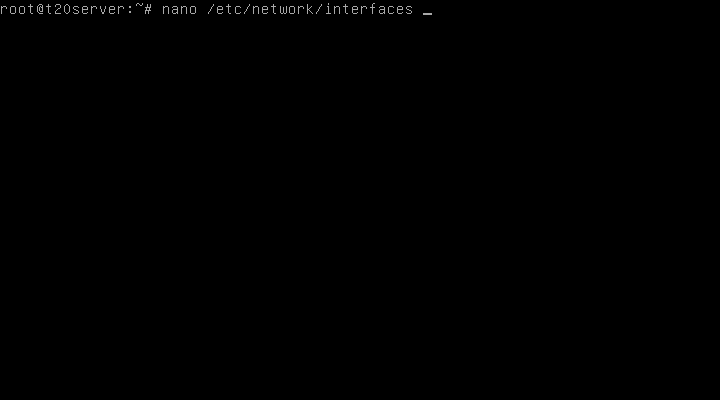
The default Debian install uses a dynamic IP address on your home network, ideally a web server should be using a static IP address that will stay the same after reboots. Type the following command to edit the network settings.
nano /etc/networking/interfaces
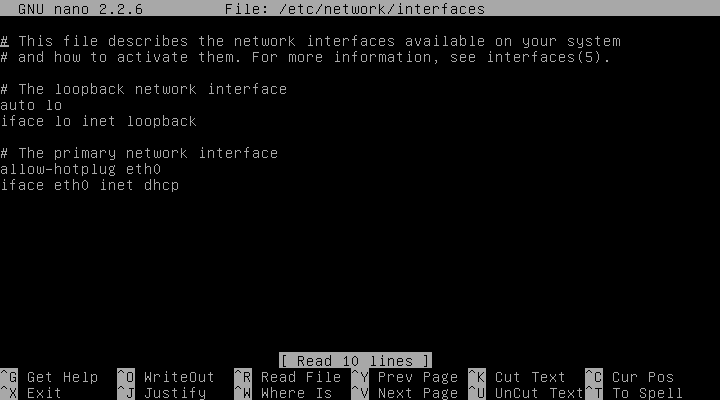
The dynamic settings will look like those above.
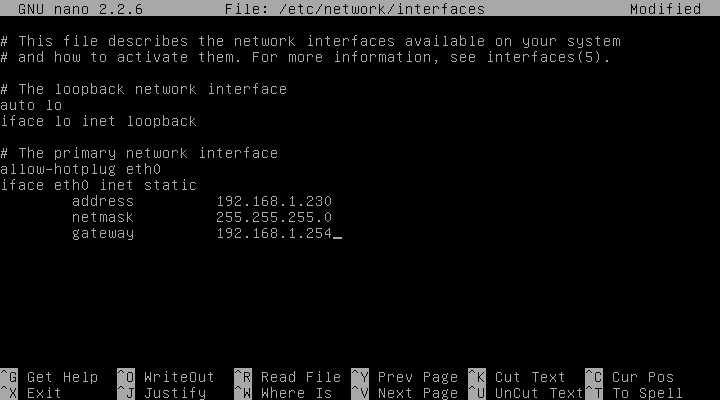
On the last line of text change ‘iface eth0 inet dhcp’ to ‘iface eth0 inet static’. Add the following information on the lines below, changing the IP addresses to match those of your home network:
address 192.168.1.230
netmask 255.255.255.0
gateway 192.168.1.254
To save the file press [CTRL + O] (to output the file), press enter to keep the name the same and overwrite the data, finally press [CTRL + X] (to exit nano)
Restart your web server with the command ‘shutdown -r now’, this will restart and load up the new network settings.
The next part of the installation process can be performed from another computer using a remote connection called SSH, in order to do this we will need to install an SSH client (for example Putty) on the remote computer. Note most Linux distributions are capable of connecting via an SSH terminal program, I still prefer to use putty.
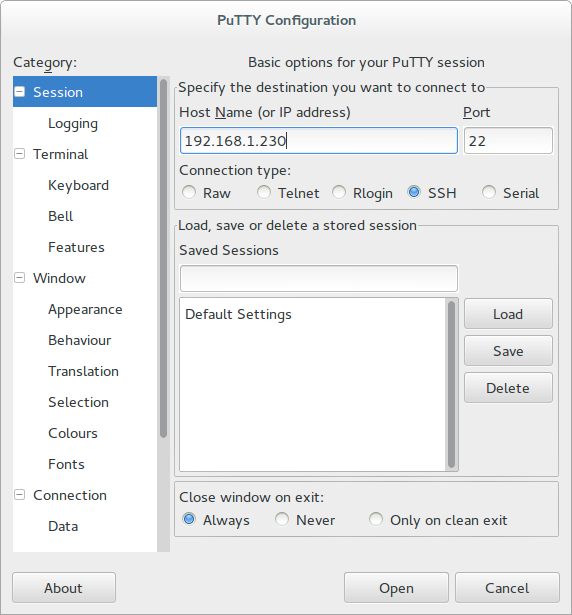
Open your chosen SSH client (for example putty), and enter the local IP address for your web server (in our example this was 192.168.1.230) and click ‘Open’.
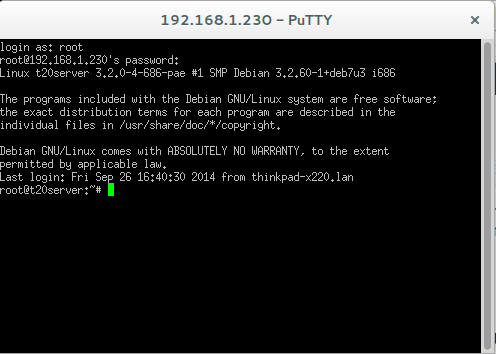
Log into your web server using the ‘root’ account

To install the LAMP (Linux + Apache + MySQL + PHP) server type the following command
apt-get install apache2 mysql-server php5 php5-mysql
This will install: Apache web server, MySQL server & the PHP programming language.
Type ‘y’ to confirm the installation.

During the installation of MySQL server you will be prompted to enter a MySQL root password, this can be the same as your ‘root’ password or something new.
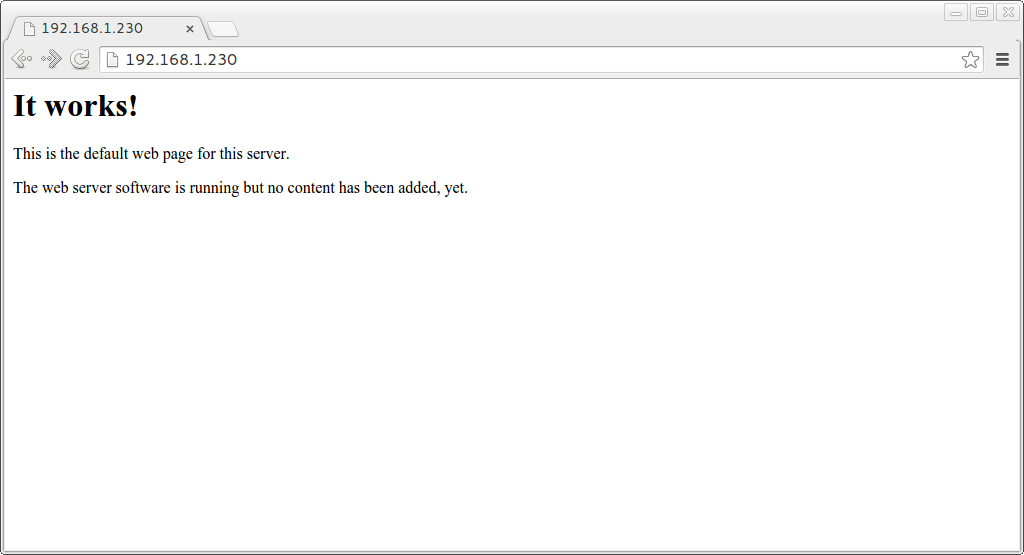
To test the installation of the Apache web server open a web browser and enter the IP address in the URL field (in our example 192.168.1.230). If the Apache web server is installed correctly you will see the ‘It works!’ message.
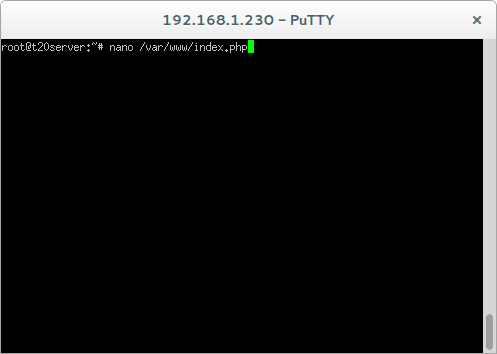
To test the PHP installation we will create a test PHP script in the web servers directory of /var/www/. Type the following to create a test PHP script.
nano /var/www/index.php
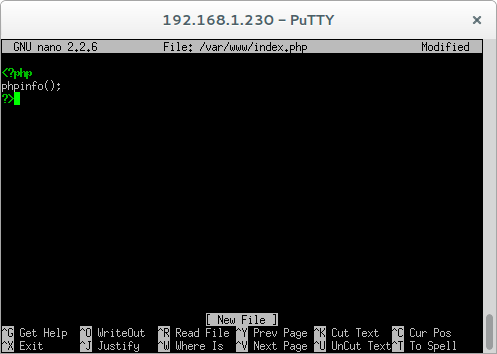
In the new file created type enter the following:
<?php
phpinfo();
?>
followed by [CTRL + O] to save the file and [CTRL + X] to exit nano.
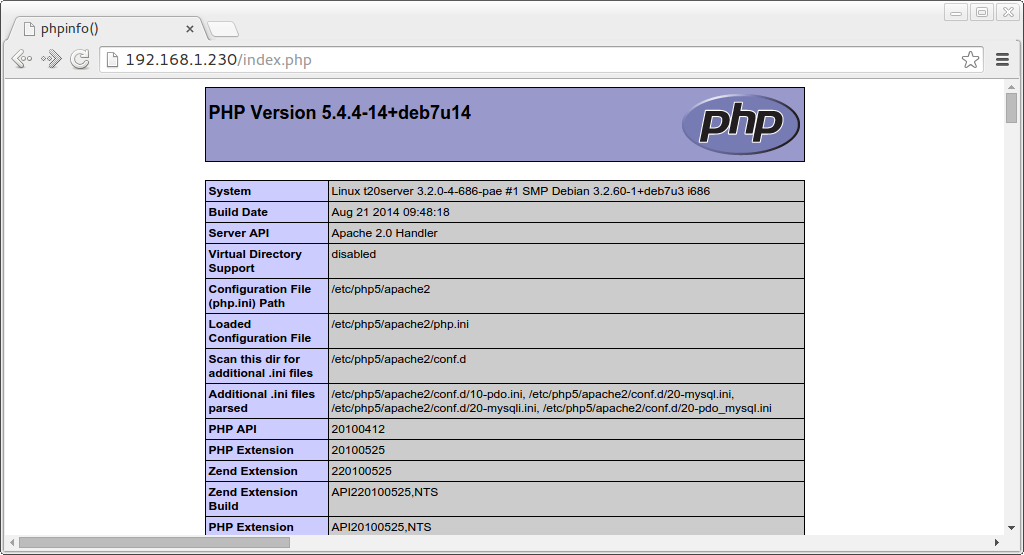
Back to the web browser enter the IP address followed by ‘/index.php’ for example ‘192.168.1.230/index.php’. If PHP has installed successfully you will see the PHP information screen.
You now have a fully functional local web server running the Apache web server, MySQL server and PHP programming language.
| Previous |
Leave a Reply