Continuing from part 1 of this tutorial, part 2 will walk you through the following steps:
- Giving a user access to the ‘/var/www/’ directory.
- Set up an FTP server, allowing our user to manage their website via an FTP client such as FileZilla.
- Install PHPMyAdmin, allowing our user to manage their MySQL databases away from the command line.
As we don’t want to be logging in as a root user to upload and manage the files that create our website on the server we will want to give the user account created during the Debian installation access to the ‘/var/www/’ directory, allowing that user to modify files within the website directory.
Returning to your SSH client (for example: Putty), log in as the root user and type the following command:
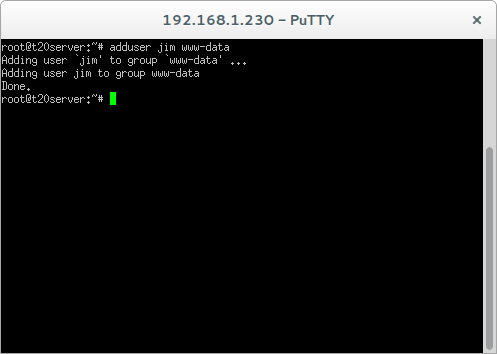
adduser jim www-data
Replace jim with the username you chose during the Debian installation. This command adds our user to the ‘www-data’ user group.
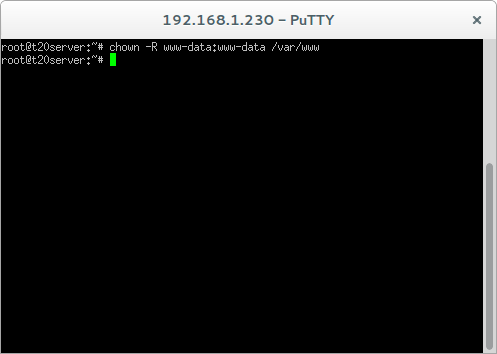
chown -R www-data:www-data /var/www
This command gives the www-data user group ownership permissions to the ‘/var/www/’ directory, the -R adds a recursive marker, automatically owning any directory within the ‘/var/www/’ directory.

chmod -R g+rw /var/www
This command gives the user group read and write permissions to the ‘/var/www/’ directory.
If you were now to log into the servers terminal using your user account rather than the root account you would be able to create, modify and delete files in the ‘/var/www/’ directory.
We will now set up an FTP server, this will allow us to modify files within the www directory via an FTP client, such as FileZilla.
Returning to your SSH client (for example: Putty), log in as the root user and type the following command:
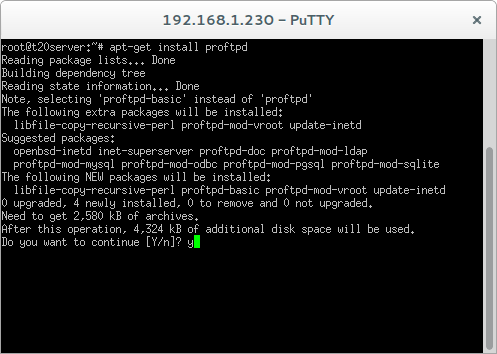
apt-get install proftpd
This command will install the Proftpd FTP server on your web server, press ‘y’ to confirm the installation.
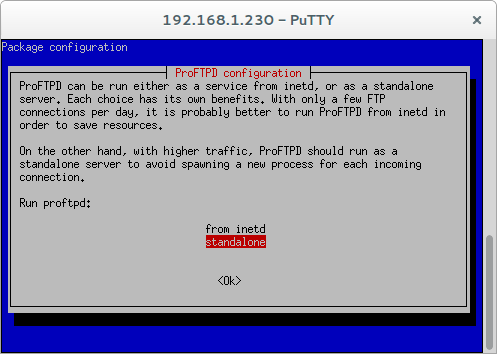
When prompted select ‘Standalone’ from the list to run the FTP server independently.
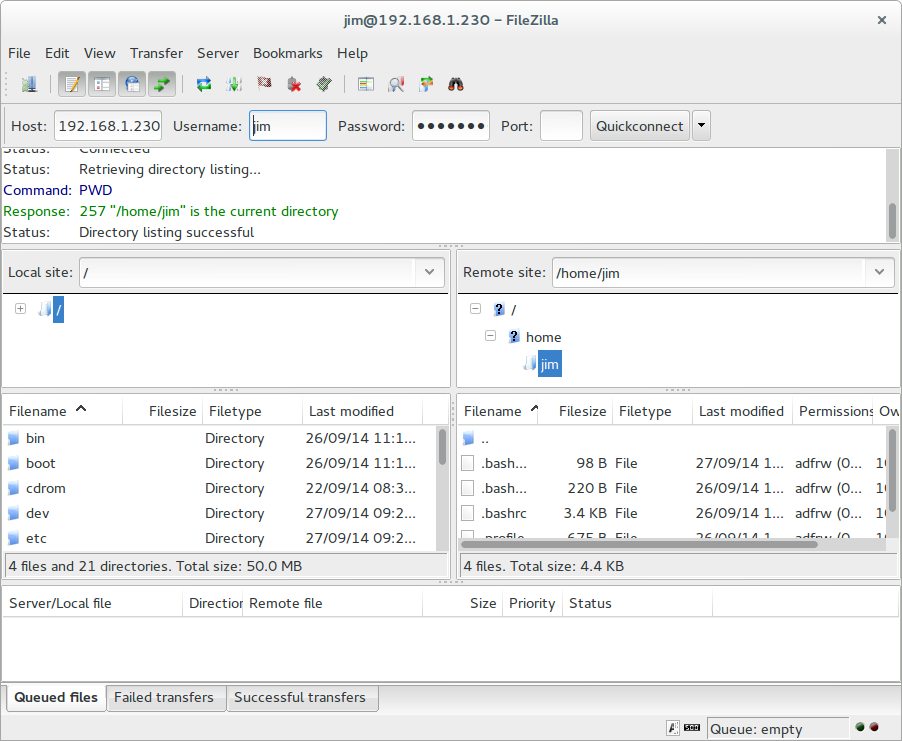
Test the FTP server installation by opening an FTP client (such as FileZilla) on your home computer, for the connection details use the local IP address as the host (in my case: 192.168.1.230), your username (in my case: jim) and the associated password with the user account. If all is well your FTP client will connect and show you your home directory on the server.
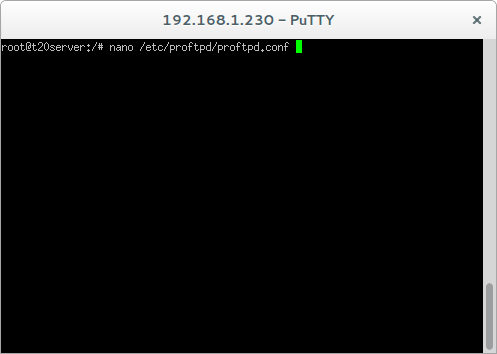
We will now modify the Proftpd configuration to show our user the ‘/var/www/’ directory uppon connection. Type the following command:
nano /etc/proftpd/proftpd.conf
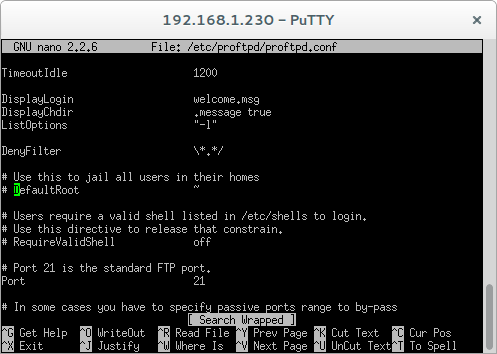
Within the proftpd.conf file find the following line:
#DefaultRoot ~
Hint: You can search for text in nano by pressing [CTRL + W]

Below that line add the following:
DefaultRoot /var/www/
This will change the default directory that your FTP client will show. Save the file by pressing [CTRL + O], then exit nano by pressing [CTRL + X].
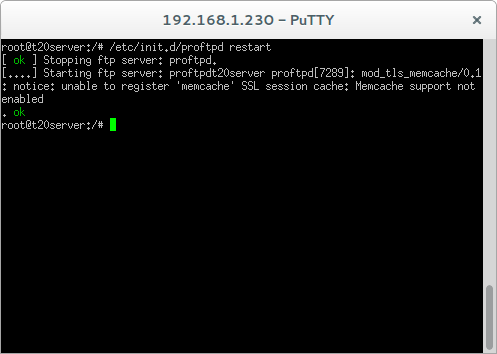
Although the configuration has been saved, Proftpd will need to reload it in order for the changes to take effect. Type the following command to restart Profptd.
/etc/init.d/proftpd restart
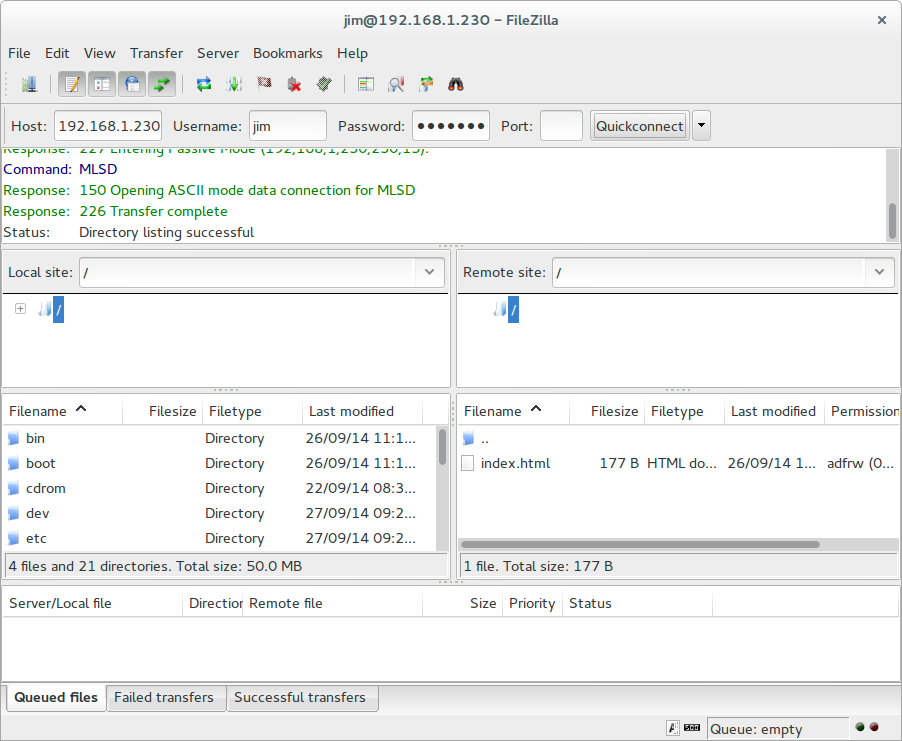
If you now connect to your web server via your FTP client the web servers directory structure will be hidden and you will only be shown the contents of the ‘/var/www/’ directory.
The next step of this tutorial is to install PHPMyAdmin, a simple to use web based management for the web servers MySQL server.
Returning to your SSH client (for example: Putty), log in as the root user and type the following command:
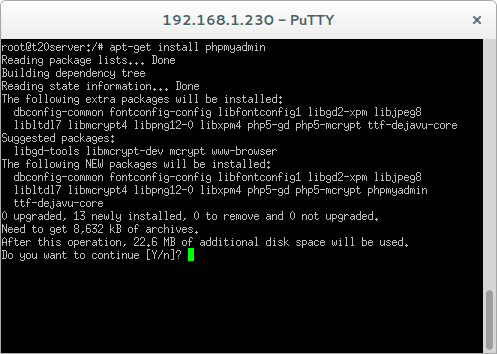
apt-get install phpmyadmin
This command will install PHPMyAdmin from the Debian repository, press ‘y’ to confirm the installation.
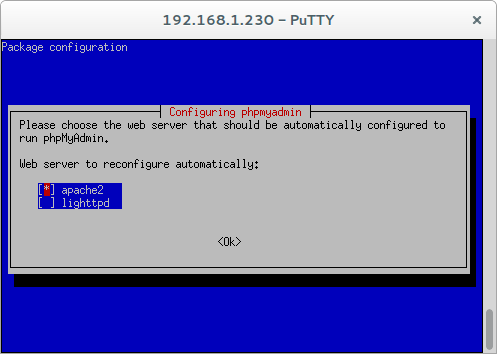
PHPMyAdmin needs to know the type of web server you are running in order to continue the installation, from the list select ‘apache2’ by using the space bar, followed by Enter to continue.
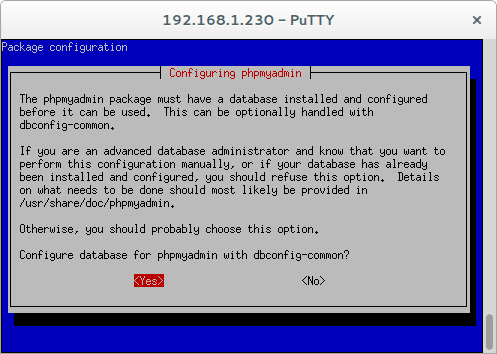
PHPMyAdmin needs to have a database configured in order to work, when prompted you may select ‘yes’ to allow the PHPMyAdmin installation to create the configuration database.
Next PHPMyAdmin requires the MySQL root password that you set during the installation of MySQL (note: this may not be the same as your root user password).

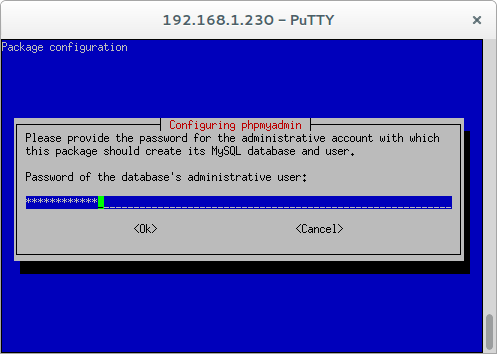
The PHPMyAdmin installation will now prompt you to enter a password to register with the database server. Enter a secure password, you will be asked to confirm it on the next screen to ensure you haven’t made any typo mistakes.
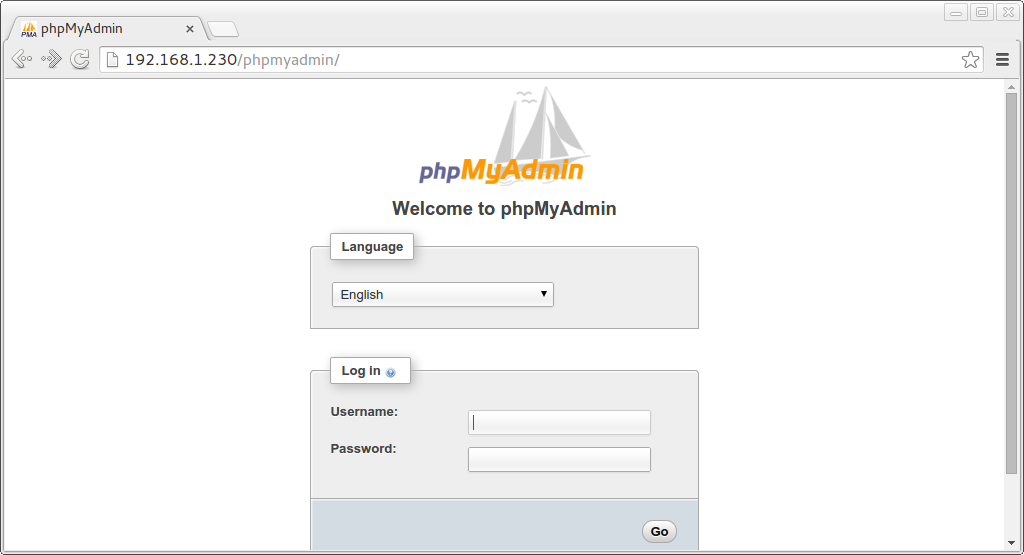
Open a web browser and enter the URL: IP address/phpmyadmin. In my case this is ‘http://192.168.1.230/phpmyadmin’. If the installation went well, you should now see the PHPMyAdmin login page. You may now log-in using the root user account details, from which you can create databases with different usernames/passwords associated to it.
This concludes the basis of setting up our Debian home web server, you should now have a fully functional web server able to server an intranet site across your local (home) network. Although fully functional, this web server isn’t very secure yet. The next stages of this tutorial will guide you through securing your web server and giving it external access from the internet.
| Back – (Part 1) | Next – Security |
Leave a Reply